Installing ceramic tiles is a meticulous process that demands both precision and patience. The success of this task isn’t just about selecting the appropriate tiles; it’s equally about the tools used to install them properly and efficiently. Whether you’re a do-it-yourself enthusiast embarking on a home improvement challenge or a seasoned professional tile installer, possessing the proper toolkit is crucial to ensure a sleek and long-lasting result. In this discussion, we’ll delve into the indispensable tools necessary for ceramic tile installation that should be present in every craftsman’s toolkit.
Table of Contents
Must-Have Tools for Ceramic Tile Installation
For a successful ceramic tile installation, having the correct tools is essential for precise and skillful work. Your toolkit must contain specific equipment designed for cutting the tiles, properly setting them in place, and applying grout – all of which are crucial for a professional-looking finish. This guide outlines the key tools required to install ceramic tiles that will enhance any room with superior craftsmanship and visual appeal.
1. Tile Cutter: for Flawless Installations
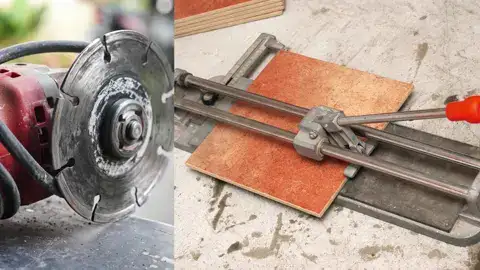
For a flawless finish in ceramic tile installation, it’s essential to have the right tools, and at the top of the list is a reliable tile cutter. Skilled use of this tool allows you to tailor each tile precisely to the space, making sure every inch is perfectly covered. Tile cutters come in various designs to suit different types of tasks. If you’re doing a job that requires straight, clean cuts—think simple layouts—the manual tile cutter is your best bet. It’s straightforward and effective for these scenarios.
On the other hand, a wet saw is invaluable for more complex designs that involve intricate cuts or curves. The wet saw uses a water-cooled blade to make exact cuts with less breakage and dust, letting you piece together an intricate design smoothly and efficiently.
2. Notched Trowels: A Foundation for Success
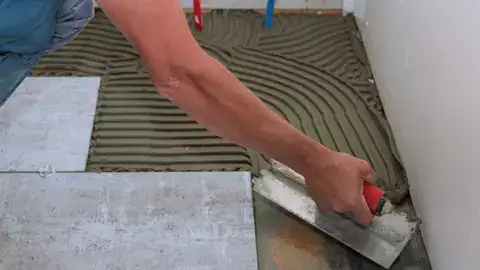
The notched trowel is an essential tool in a tiler’s kit, crucial for achieving a solid and long-lasting tile installation. It excels at applying adhesive, a key step to prevent the tiles from shifting and to ensure a smooth surface. The unique design of the notched trowel, featuring various notch sizes, allows for an even distribution of mortar or adhesive, creating a consistent layer that securely binds tiles to the surface. This even spread is vital to prevent lippage, a condition where tiles are not laid flat and their edges stick out—by using the notched trowel, tiles are set uniformly, ensuring a flat and level finish on floors and walls.
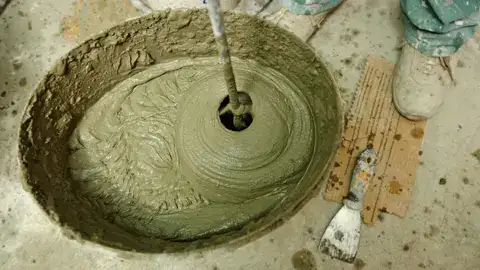
3. Mixing Paddle: Achieving Consistency
A mixing paddle is essential for obtaining a uniform mixture of tile adhesive and grout, which is crucial for the proper installation of ceramic tiles. This tool is designed to attach to a standard power drill, and it’s key for achieving the right texture in your blending materials. During tile installation, precision in mixing isn’t just about being thorough; it’s critical. Variability in your mixture can lead to tiles that don’t stick correctly, that may shift, or even become loose over time. Additionally, a mix with clumps can cause grout lines to be uneven, not only affecting the look of the tiling but also potentially weakening its structural soundness.
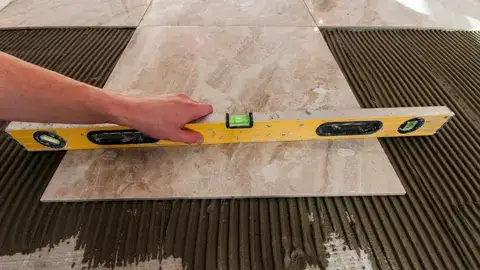
4. Level: Balance in Every Tile
In the precise task of installing ceramic tiles, a level is an essential tool to ensure each tile is placed perfectly straight and even, both side-to-side and top-to-bottom. It’s vital to frequently use the level throughout the process to avoid uneven surfaces, which can lead to unsightly issues like water pooling or misaligned patterns that disrupt the overall look. Regular use of a level helps maintain a flawlessly flat surface that’s visually and tactilely appealing. For any skilled installer, a level is not just a tool; it’s an indispensable ally for maintaining accuracy and order in their work.
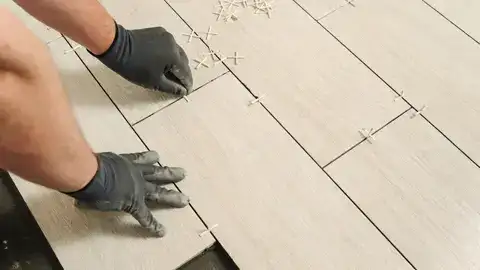
5. Tile Spacers: Precision in Uniformity
Tile spacers play a critical role in ceramic tile installation, ensuring symmetry and uniformity. Their main function is to create even and consistent spacing between tiles, which is essential for both the aesthetic appeal and the structural integrity of the tiling work. As tiles are installed, spacers keep them equally distanced from each other, preventing shifting or misalignment as the adhesive sets. Proper spacing is key to achieving a visually pleasing pattern with straight lines that meet neatly at the corners. The absence of these important tools could result in a less professional finish and may lead to cracking and instability over time due to uneven gaps.
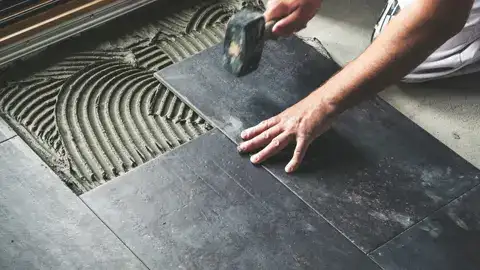
6. Rubber Hammer: Precision Meets Delicacy
A rubber mallet is an essential tool in a tiler’s kit, crucial for ensuring accuracy and gentleness. Unlike metal hammers, it exerts a soft force to position tiles without breaking the fragile ceramic. The mallet’s head spreads the impact out, making it perfect for securing tiles into their glue or lining them up with spacers. It’s particularly useful for adjusting uneven or resistant tiles to sit flush with the base. Additionally, during the alignment phase, lightly tapping on raised areas with the rubber hammer helps achieve a perfectly level and seamless tiled surface.
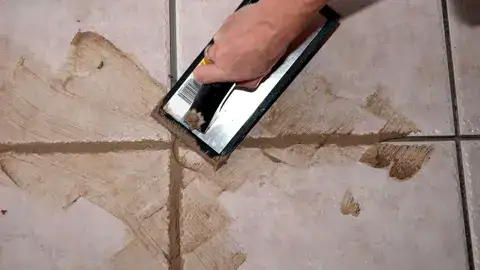
7. Grout Float: The Art of Filling Gaps
Grouting is a crucial final step in the ceramic tile installation process that ensures a polished finish. To execute this properly, a grout float is essential. More than just filling spaces between tiles, the grout float creates a uniform, seamless appearance. Picture the tiles as individual landmasses; the grout acts like a binding sea that unites them into one solid landform. The grout float, equipped with a rubber base to protect the tiles, is used to expertly press and smooth the grout into gaps. By angling the float as you work, it effectively packs grout into every space and removes any excess, resulting in sharp, clean lines that enhance the overall look of your tiling.
8. Sponge & Bucket: Cleanliness Equals Professionalism
A simple yet vital pair, the sponge and bucket, are key to keeping a workspace clean and reflecting the high standards clients expect. During tiling, grout and adhesive residue can mar a tile’s appearance. An all-purpose sponge effortlessly cleans these surfaces, removing excess materials with ease. Paired with a bucket filled with fresh water, the sponge is rinsed repeatedly to ensure that the tiles shine brightly, showcasing the quality of an expertly completed project.
9. Knee Pads or Kneeling Mat: Your Comfort Matters
Installing ceramic tiles requires not only artistic skill but also significant physical effort, particularly on the knees. The job involves many hours spent kneeling on hard surfaces, which can take a toll on the body, especially the joints. Therefore, knee pads or a kneeling mat are not mere comforts; they are crucial for ensuring your physical well-being. High-quality knee pads provide padding and support, helping to distribute your body weight more evenly and reduce stress on the kneecaps. Meanwhile, a quality kneeling mat acts as a soft cushion between you and the hard floor, making it possible to work for longer periods without pain.
Aside from their obvious protective benefits, these tools also increase work productivity and concentration. A worker who is free from pain can place tiles with greater precision and care. This meticulous installation results in a professional-looking finish that embodies true craftsmanship.
Conclusion
While ceramic tile installation might seem straightforward at first glance, having the right tools will empower you to execute flawless installations time after time. From cutting and spacing tools to adhesive application and personal comfort items, preparing well before laying your first tile means setting yourself up for success – resulting in beautiful, durable surfaces that stand the test of time.
